I love these colorful painted fish created by my first grade students. We read the book Fish Eyes by Lois Ehlert. There are a lot of great fish inspiration in it and the kids love to read it. To get started I made some drawing pages to help them. There were ideas for body shapes, fins and other fish details. Students made sketches in pencil first and then black tempera paint on large paper. We talked about the differences in drawing their fish in pencil and then using a brush. The next class the kids used colorful tempera to fill in the fish and add any background details. The following class the background was painted using liquid watercolors. I love how colorful they are and how creative student were when drawing their fish. It was also a great project for the kids to use tempera and watercolor paints. Here are some of the finished pieces. If you would like to see them all you can visit our online gallery here: http://www.artsonia.com/museum/gallery.asp?project=1131832
Sunday, June 12, 2016
James Rizzi Citiscapes
My son introduced me to this fun artist. He came home talking about an artist he learned about in art class at his school. He liked him so much I decided to look him up. I immediately knew that my kids would love looking at his whimsical city scapes too. My son's project was done in watercolors but I adapted it to be a mixed media project. They came out great. The kids were so into them and added lots of details that made them all so different. Here are some photos of the finished pieces. If you would like to see all of them you can visit our online gallery here: http://www.artsonia.com/museum/gallery.asp?project=1157672
Saturday, April 2, 2016
Third Grade Stop Motion Animations
This year I decided to let my students choose the idea for their movies. In the past I have chosen the theme for them thinking I was helping them but they were very capable of coming up with their own ideas, creating their scenes and characters and filming their movie. I made a checklist to help keep them organized. Stop motion animation is always a favorite lesson but I think choosing their own ideas made it even more of a hit. I was impressed with their ideas and realized how limiting it was when I made all the decisions. I have such a creative group of students. Check out their class movies.
Wednesday, March 23, 2016
Internet Safety Super Heroes
This project was a collaboration between our library media specialist and myself. In library, fourth grade students learned about being a good digital citizen. Their assignment was to create a superhero and write a script that would teach other students how to be good digital citizens. In art class they used their ideas to create the superhero. We used color pencil and watercolor for the background. Students tried to give the illusion of space by using bright, bold colors for the foreground and lighter values for the middle and background. When they were finished we used the Chatterpix app on the iPads to record our messages. Each superhero has a QR code so that students can quickly scan and hear their message. Here are a few finished ones.
Sunday, March 20, 2016
Color Mixing Fun Grade 1
I'm always looking for different ways to let my first grade students practice mixing colors. The first day we talked about the primary colors and how we can use them to mix other colors on the color wheel. I demonstrated how to mix colors using model magic clay, which the kids always think is so amazing, and a palette and watercolors. I split the class up into groups. Half of them practiced mixing with the paint and half of the class mixed with clay and then the two groups switched. Some of the kids were even able to mix some of the intermediate colors. I saved the colors we mixed with the model magic for the next class. When the kids came in next time we used the model magic and tooth picks
to create these colorful sculptures. Some of the kids had a hard time
getting their sculptures to stay up as they build but everyone still had
a great time. I'm not sure if they made it home in one piece but they
definitely learned a lot about color mixing.
Saturday, February 6, 2016
Second Grade Fruit and Vegetable Drawings
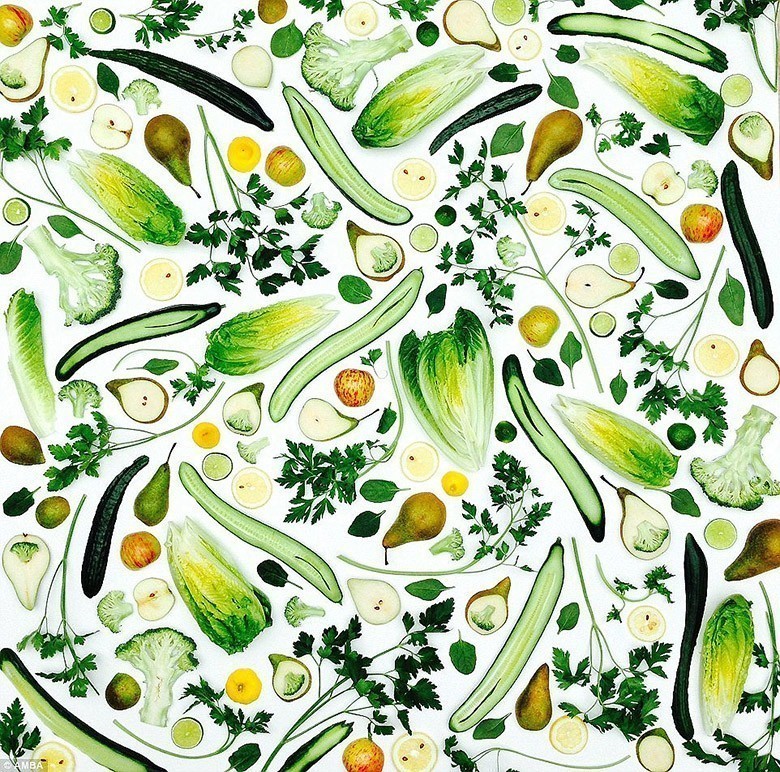
This project was inspired by two things, a beautiful painting by Miroco Machiko, a Japanese artist and illustrator and a healthy foods unit taught by our PE teacher and school nurse. I loved the simple shapes and bright colors of this print and thought the children would love it as well. I also showed them Artist photographer, Amber Locke's Geometric plant compositions of raw fruits and vegetables.
We used coloring book pages of fruits and vegetables at first to draw so that we could focus on shape. Once we went on to final copy paper I brought in some real food so that we could observe the different colors and textures. The kids really enjoyed having the fruit and vegetables to look at. We will hang these up in the hallway with some healthy eating tips. Here are some photos of our inspiration pieces and some of the kids work. You can see all of our artwork on the Artsonia site.
Friday, January 1, 2016
Pinch Pot Animals
These cute pots were a challenge for my third grade students. I used to make pinch pots with first grade but found that I ended up doing most of the work. Pinch pots have always been challenging for kids in my art classes. The clay either dries out from them overworking it, they have trouble pinching and turning as well as getting all of the clay pinched at the bottom without thinning out the side to much. I love pinch pots and they look so simple but they are definitely not. The extra challenge with these were making them sturdy enough to add animal decorations to. There was a great variety of animals created and they did an excellent job underglazing them. If you would like to see all of our pinch pots visit our online art gallery at: http://www.artsonia.com/museum/gallery.asp?project=1072481
Monday, December 28, 2015
Fun Way of Displaying Second Grade Owls
Love the way the owls look on these cut trees. It makes for a great display of artwork in the library. The second grade students did such a great job. Love the way they look in a group. If you want to see all of them go to: http://www.artsonia.com/museum/gallery.asp?project=1046948
Wednesday, December 16, 2015
Storyteller Dolls
Fourth grade students looked at Native American Storyteller dolls. We talked about Cochiti Pueblo potter,Helen Cordero and her clay figure that represents her grandfather telling Native American Tales. We also discussed the connection Helen had with her artwork and grandfather. I asked my students to make a connection with their artwork like Helen. The kids did a great job on them. We used an upside down pinch pot for the body. Below is a picture of a few finished pieces. If you would like to see more go to our school gallery at http://www.artsonia.com/museum/gallery.asp?project=1035988
Each Student wrote an artist statement about their piece. Here are a few quotes they wrote about their work.
Artist Statement (what lily3425 said this about his/her artwork)
This piece is important to me because this is me and my dad watching football my dad and I bond over football because every night we play pass with a football every time the patriots get a touchdown my dog Autumn gets a cookie.
Artist Statement (what Nagy2 said this about his/her artwork)
This piece is important to me because it is my mom and I when I was a baby. The hardest part for me was the legs because even when you scratch and attach, they still break off sometimes.
Artist Statement (what Beaulieu1 said this about his/her artwork)
This is important to me because I like soccer. Because it's fun. It is fun because I keep the Jersey.
Sunday, October 4, 2015
Second Grade Robots
This lesson is always a hit with the kids. This year we did the background a little differently. You can find previous years robots here. I really wanted the robots to stand out from the background so we used black paper and metallic paints to print gear-like designs. I collected some found objects; Lego and Kinex pieces, cardboard and plastic lids. The kids dipped the objects in the paint and pressed them onto the black paper. They were the perfect backgrounds for these cool robots. Here are a few of the finished products and you can check out the rest on Artsonia.
Saturday, September 19, 2015
2D and 3D with the Quiver 3D coloring app
To start the year, second grade students were inspired by the book The Dot by Peter Reynolds and then able to see their two dimensional dot turn into a 3D sphere using the Quiver app for ipad. It was a great first art class lesson. The students were so excited to see their drawings change and the app was very quick and easy for them to do. Check out some videos and see the magic!
Sunday, April 19, 2015
Imaginary Animals
Second grade students combined real animals to create these fun imaginary ones. The coloring was done with color pencil and we talked about layering different colors and lines to come up different textures for these creative creatures. I showed them Carla Sonheim's book,
Drawing and Painting Imaginary Animals: A Mixed-Media Workshop and talked about how she layered color to textures to her creatures. For the background we used watercolors and a palette to mix lighter shades. This filled in the background nicely and let our animals stand out. Here are some of the finished ones. You can also see all of them on Artsonia.
Saturday, April 11, 2015
Elements of Art Super Heroes
Fourth grade students did a great job creating these fun superheroes inspired by an element of art. After reviewing the elements of art we brainstormed ideas. I loved hearing all the creative powers they came up with. We used sharpie to outline our drawings and then crayons and liquid watercolors to add color. We also used the ComicBook! app on the iPads to create comic book pages sharing what our superheroes power was. Here are some of the finished pieces. You can see the exhibit on Artsonia here:http://www.artsonia.com/museum/gallery.asp?exhibit=934637
Tuesday, March 17, 2015
Second Grade Self-Portraits and Chatterpix Kids
My second grade students just finished their self-portraits. After looking at a variety of portraits and sketching practice students were asked to create a self-portrait that communicates personal interests. They were also asked to choose what painting material they wanted to use. We spent a class period practicing with both mediums and then discussed the qualities of both. Most of the kids chose tempera paint for their portraits. They found the watercolors frustrating. This project was quite the challenge but the kids did a great job. I found a great app called ChatterPix. It's a photo app that allows you to make your image talk. You can also add filters, text and stickers. This app was easy to use and a great way for students to present their artwork and discuss what was meaningful to them. Once each student made their individual ChatterPix I used iMovie on the iPad to put them together into one little movie. Here are a few pictures of our self-portraits and examples of ChatterPix. You can see all of the class movies here:https://sites.google.com/a/bownet.org/besart1/home/grade-2
Sunday, February 15, 2015
Kindness Quilts
I love doing collaborative projects and this one is a new favorite which I hope continues throughout the years. The library media specialist and I noticed that we did similar projects and decided to combine them into an integrated lesson. This is the blog post for my Bedtime Story Quilts.
Our library media specialist does a Kindness quilt project with her first grade students based on the book The Kindness Quilt, a story of Random acts of kindness pictured on a paper quilt. Students thought about ideas for their own on acts of kindness, created a drawing and used the iPads to photograph their drawing and record a sentence about their drawing. The library media specialist then created QR codes for each of the groups. Students were able to scan the codes and listen to all of the projects.
This year the kids read the story and brainstormed ideas during library time while working on the quilt in art. The kids came to art with their planning sheet and I helped them create their final drawing and border for the quilt. We talked about zooming in and drawing larger for the final copy as well as adding details to illustrate their act of kindness. The quilt squares were made using crayon resist. We created patterns on white paper and then painted over them with liquid watercolors. The finished pieces went back to the library where the kids photographed them and used the app Puppet Edu to record their sentences. The kids did a great job and the quilts look beautiful in the hallway.
Our library media specialist does a Kindness quilt project with her first grade students based on the book The Kindness Quilt, a story of Random acts of kindness pictured on a paper quilt. Students thought about ideas for their own on acts of kindness, created a drawing and used the iPads to photograph their drawing and record a sentence about their drawing. The library media specialist then created QR codes for each of the groups. Students were able to scan the codes and listen to all of the projects.
This year the kids read the story and brainstormed ideas during library time while working on the quilt in art. The kids came to art with their planning sheet and I helped them create their final drawing and border for the quilt. We talked about zooming in and drawing larger for the final copy as well as adding details to illustrate their act of kindness. The quilt squares were made using crayon resist. We created patterns on white paper and then painted over them with liquid watercolors. The finished pieces went back to the library where the kids photographed them and used the app Puppet Edu to record their sentences. The kids did a great job and the quilts look beautiful in the hallway.
Monday, February 9, 2015
Winter Cardinals Grade 1
I have been photographing the cardinals visiting my bird feeders this year and thought my first grade students would love to see them. After looking at the pictures and hearing stories about other backyard bird feeders we sketched some cardinals. I had photographs for them to look at as well as some easy how to draw sheets I found on the internet. Once the sketches were done we drew our final copy on blue construction paper and used tempera paint to add color. We looked at the cardinal photos and observed the different shades of red. I mixed up a light, medium and dark shade for the kids to use when painting. Once the paint dried we used cray-pas to add the branches. We talked about a variety of trees you would see and the kids chose which ones they wanted to use. We tried to blend different shades of the tree colors with the cray-pa. The final detail was adding snow with white tempera paint.
Sunday, January 25, 2015
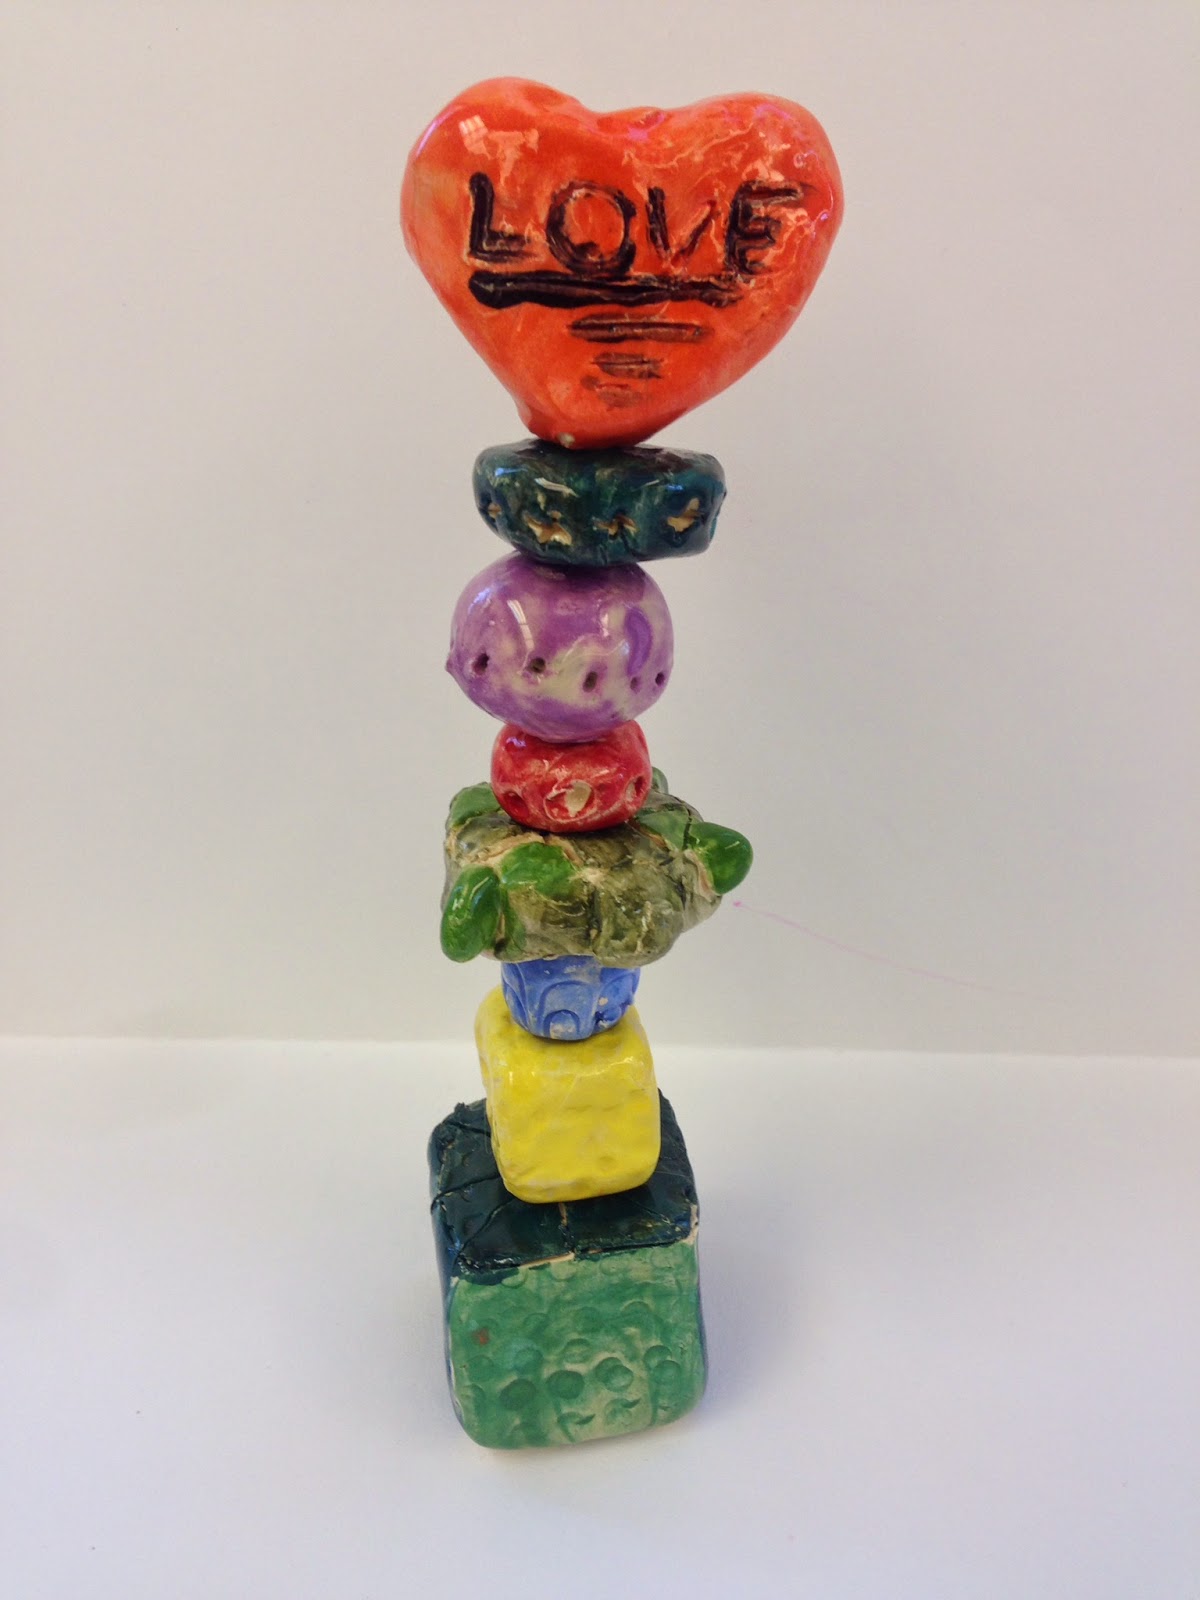
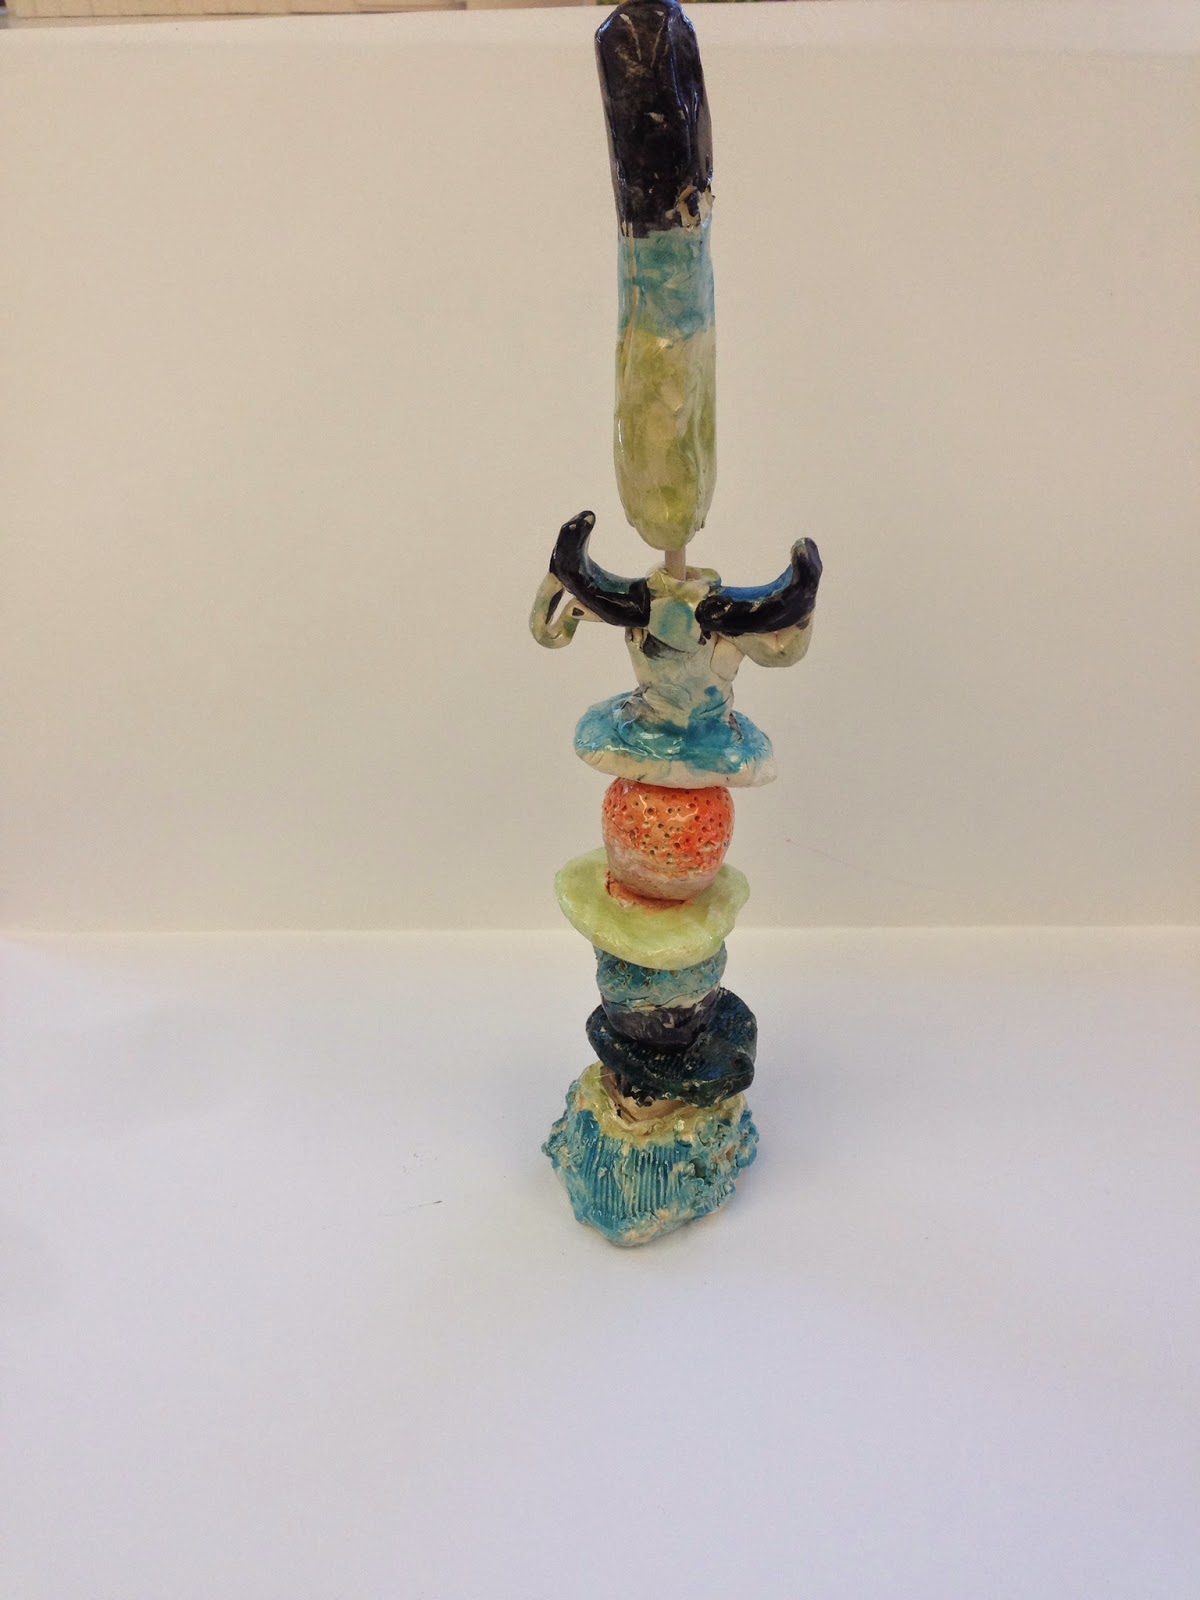
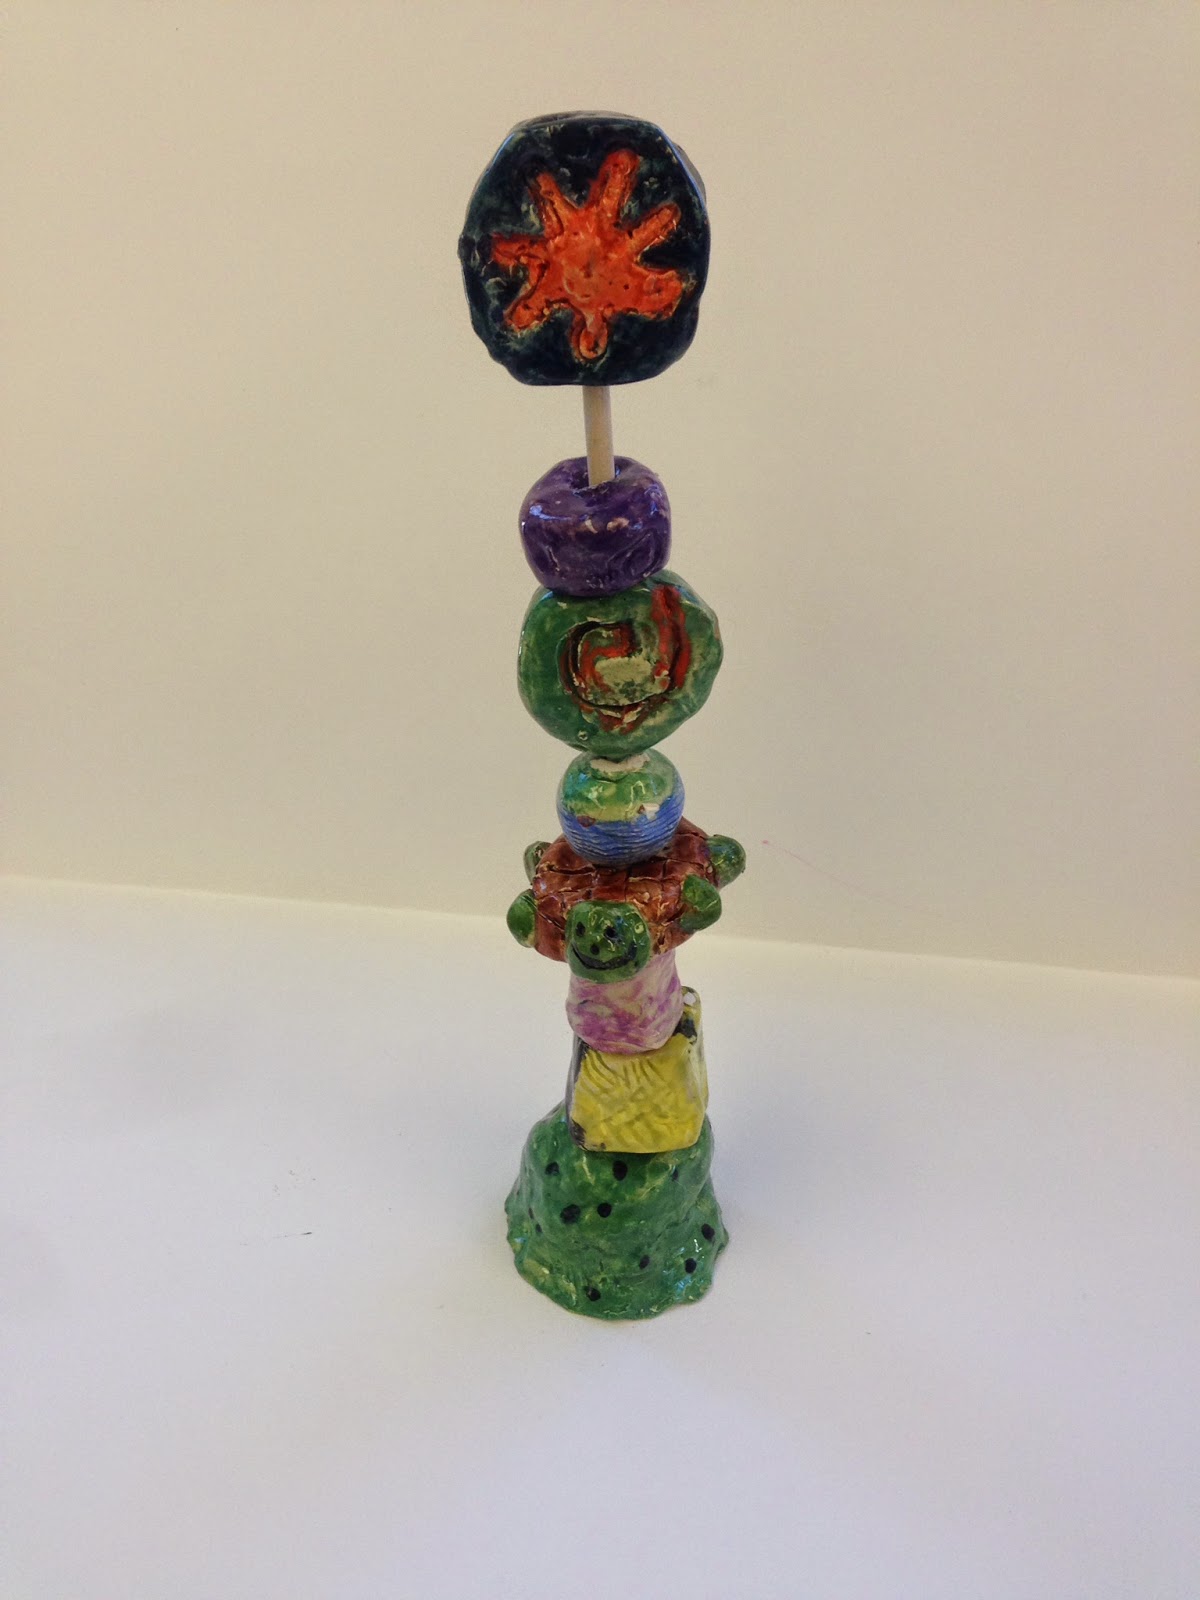
Fourth Grade Clay Totems
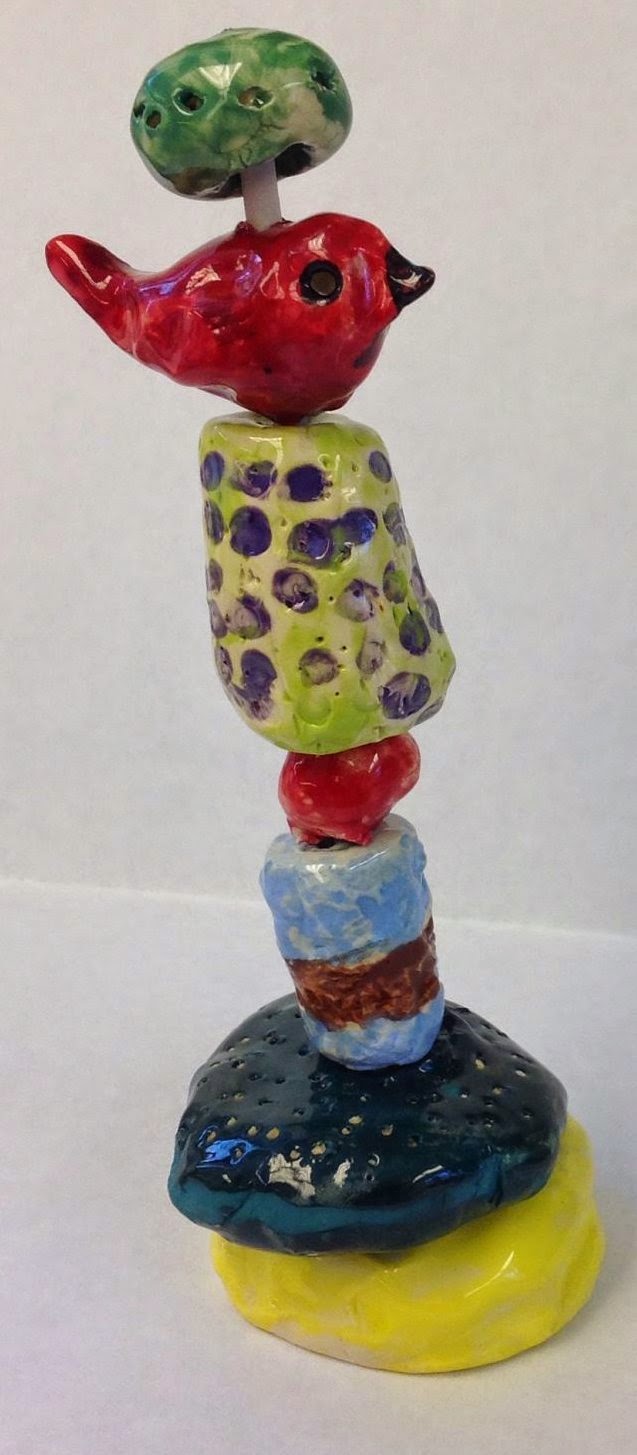
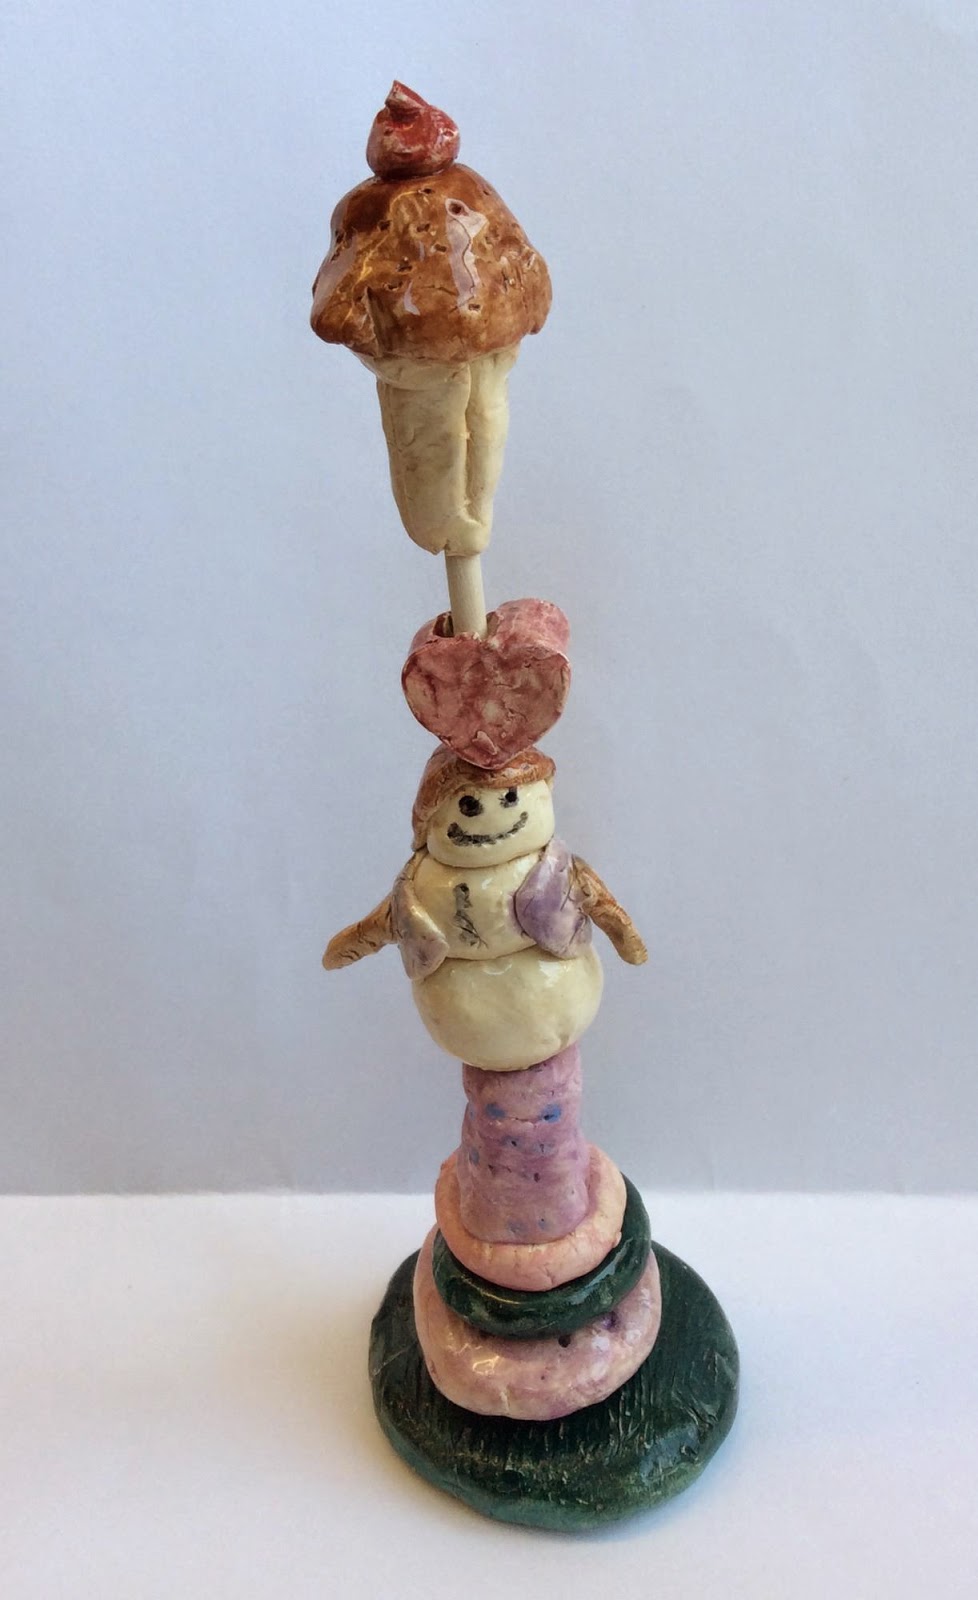
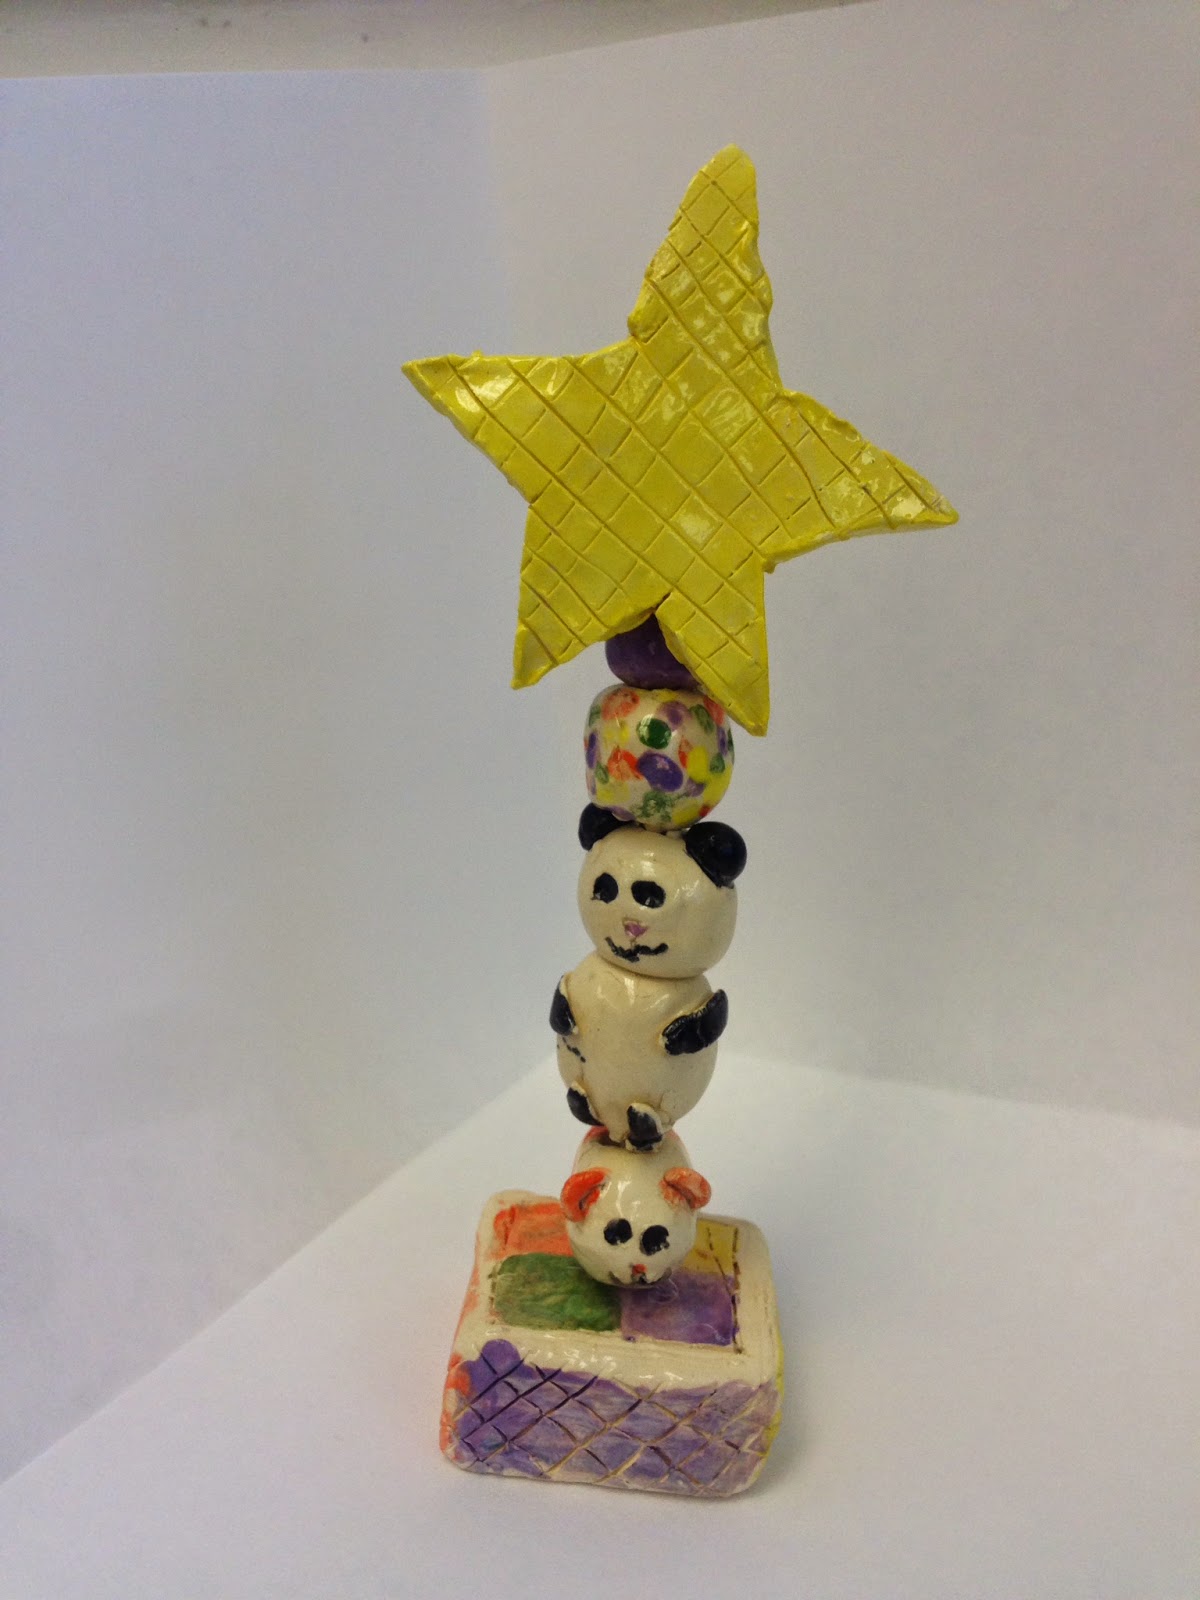
Fourth grade just finished a challenging clay project. I found these amazing clay totems at a blog called Ceramics 283. The photos were so inspiring I wanted to try a version of this with my students. It was definitely a challenge for them but they loved it. If I am going to do it next year I will make some modifications for sure. The most challenging parts were making a sturdy base and beads that would fit on the wooden dowel.
After looking at some of the totem photos kids sketched some ideas. Some chose to do a theme and some just a variety of shapes. Each totem had a base, beads and a topper. The project took a lot longer than I had thought. Many kids needed to restart their beads because the hole they made was to small. The firing also took longer because I had to use bead racks and those take longer to load in the kiln. We finally finished and the kids were happy with the results. My students photograph all of their artwork to a website called Artsonia where they each have a digital portfolio. They also have the option of titling their work and leaving comments. I thought this comment summed up the project very well.


After looking at some of the totem photos kids sketched some ideas. Some chose to do a theme and some just a variety of shapes. Each totem had a base, beads and a topper. The project took a lot longer than I had thought. Many kids needed to restart their beads because the hole they made was to small. The firing also took longer because I had to use bead racks and those take longer to load in the kiln. We finally finished and the kids were happy with the results. My students photograph all of their artwork to a website called Artsonia where they each have a digital portfolio. They also have the option of titling their work and leaving comments. I thought this comment summed up the project very well.

Monday, January 19, 2015
Classroom Mode on Artsonia
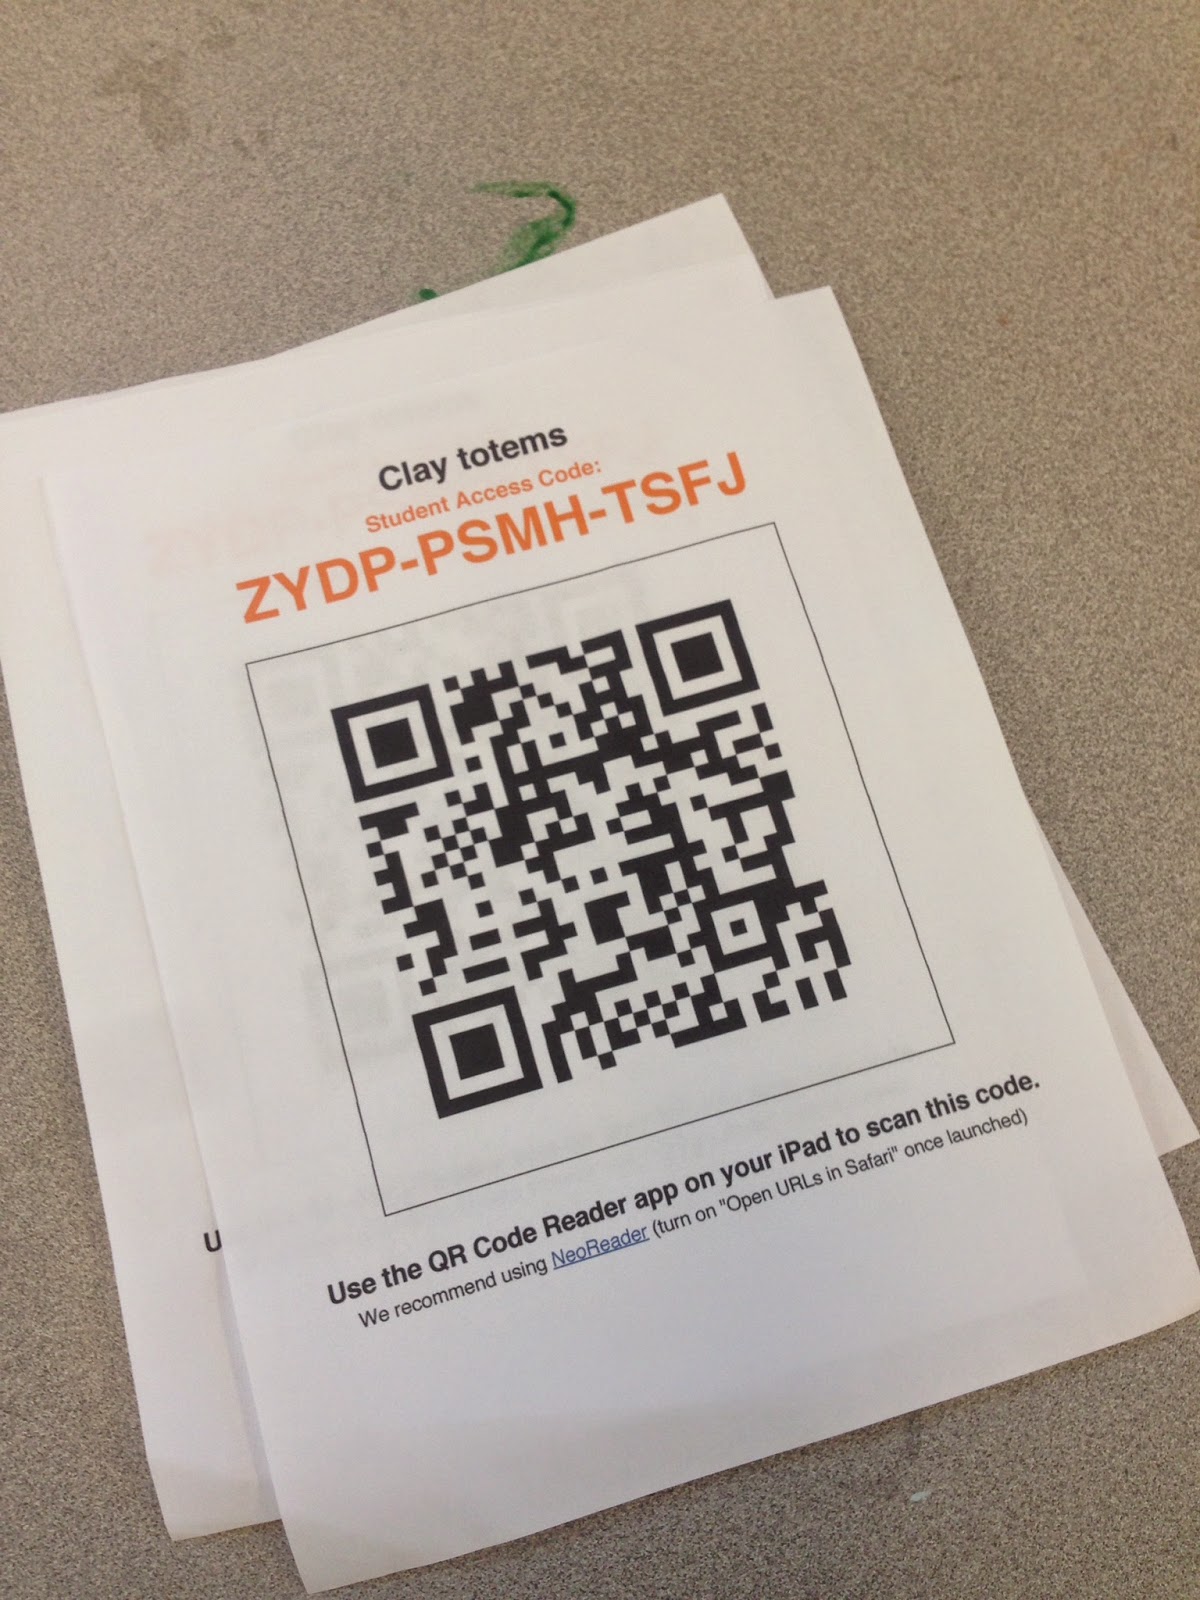
I have been using Artsonia for about 9 years now and love it. It is a great way to showcase student artwork as well as keep parents informed. Check it out at http://www.artsonia.com/. Each one of my students has their own digital portfolio with all of their artwork in it. I have 18 classes with about 20 students on average so it can get overwhelming some times. However, I think it is well worth it. Artsonia came out with a new feature called Classroom Mode. This allows me to save time by having students upload their artwork & statements. Starting this year my third and fourth grade students use the ipads to upload their artwork to the site themselves. It's a great time saver and it also teaches the kids how to photograph their artwork and also add titles and artist statements. I just print the QR code that Artsonia assigns to each of my exhibits and then the students scan the code which brings them to the Artsonia site. They choose their name, take and upload and edit their photo as well as add titles and artist statements if they choose. In the beginning it took a little extra time teaching them the process but now they are getting really good at it.
Another great feature is that you preview the entry before it is posted to the site. I can make corrections to the image and/or artist statement and publish it immediately, or send it back to the student for corrections. Right now not many of my students are choosing to write artist statements, we are still working towards that. I have 5 ipads to use and we don't always have time. I have loved reading some of the statements that the kids have written though. It has great potential for a reflection piece in class.

Another great feature is that you preview the entry before it is posted to the site. I can make corrections to the image and/or artist statement and publish it immediately, or send it back to the student for corrections. Right now not many of my students are choosing to write artist statements, we are still working towards that. I have 5 ipads to use and we don't always have time. I have loved reading some of the statements that the kids have written though. It has great potential for a reflection piece in class.
Sunday, January 11, 2015
Sunday, November 9, 2014
Clay Owls- Two different Ways
Second grade students created clay owls after working on their Owl Close Up pictures in cray-pa. Last year we made these from slabs of clay and this year was going to be the same...until my slab roller broke and I had only enough for 2 of my four classes. I looked online and found another owl project made more like a pinch pot and decided to give it a try. I found this great website that had pictures of the process. If you ever teach a project about birds this site is amazing; http://redandthepeanut.blogspot.com/2013/09/how-to-make-ceramic-pottery-owl-out-of.html
Both types of owls came out great. I think the slab owls are easier for the kids but I think most of them would have chosen the 3D one. They both allowed for the kids to practice attaching clay with slip and score and were a great review of adding texture and a great follow up to our 2D owl project.
Here are a few of them:
Subscribe to:
Posts (Atom)